
Introduction
So you are starting a new WordPress site in 2023? Cool! No matter if you are starting a blog or a eCommerce site, doing these actions will improve the performance, security and the overall smoothness of the website. Let's get started!
1 - Compress images before you add them
Before you start to upload/import all the images, you need them to be lightweight. There are several good premium solutions, but if you are just getting started, why don't you avoid this issue in the future?
Resize Image After Upload is a free WordPress plugin that will compress any image that you upload. You can control the compression ration, but the defaults are good enough in my opinion. With this plugin, you can safely upload a 10MB image without killing your performance.
Installing this plugin as the first thing you do will guarantee that you will have small images and will save you disk space in the long run.
 Alexander
2 - Disable features that you don't use
WordPress is a huge software. It does a lot, but do you really need everything? Disabling things that you don't use can actually make a huge difference. To do that, I would recommend a free plugin called "Unbloater"
Debesyla
Unbloater is a old but awesome WordPress plugin. It allows you to remove a lot of unnecessary features and will make WP feel more like at a home for you. I recommend the following settings:
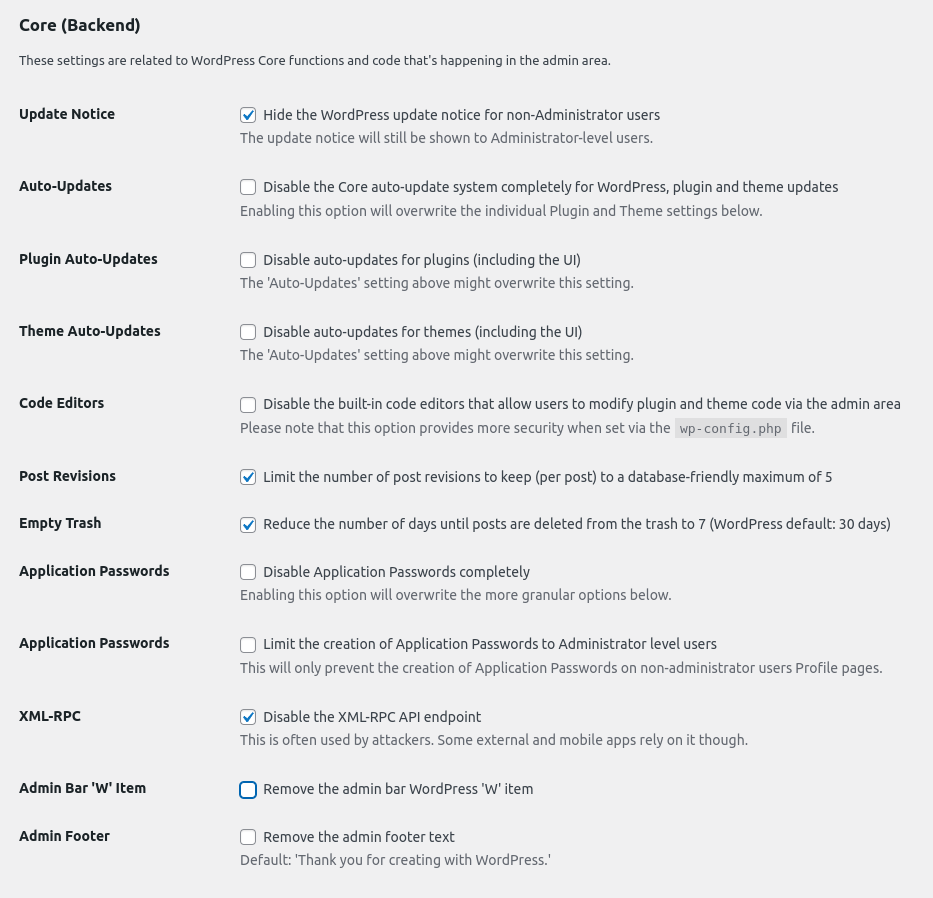
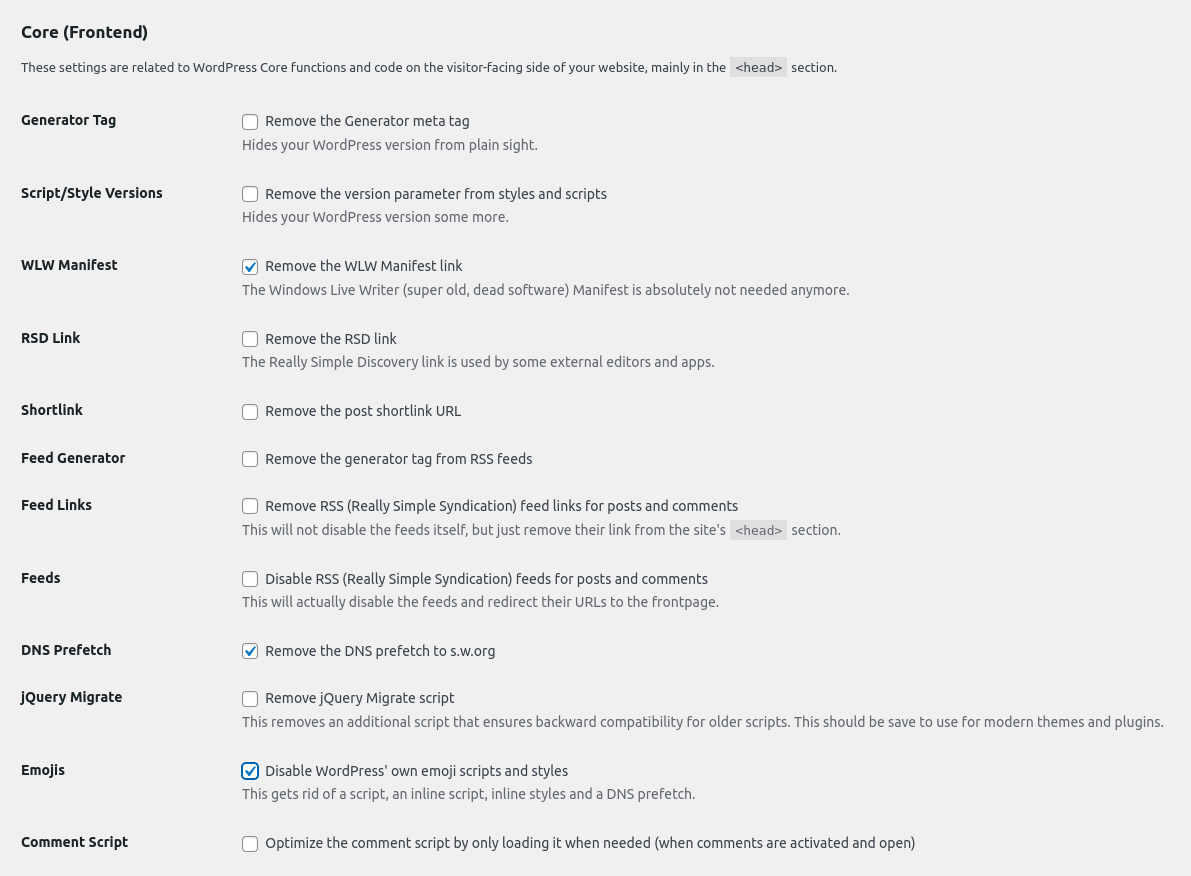
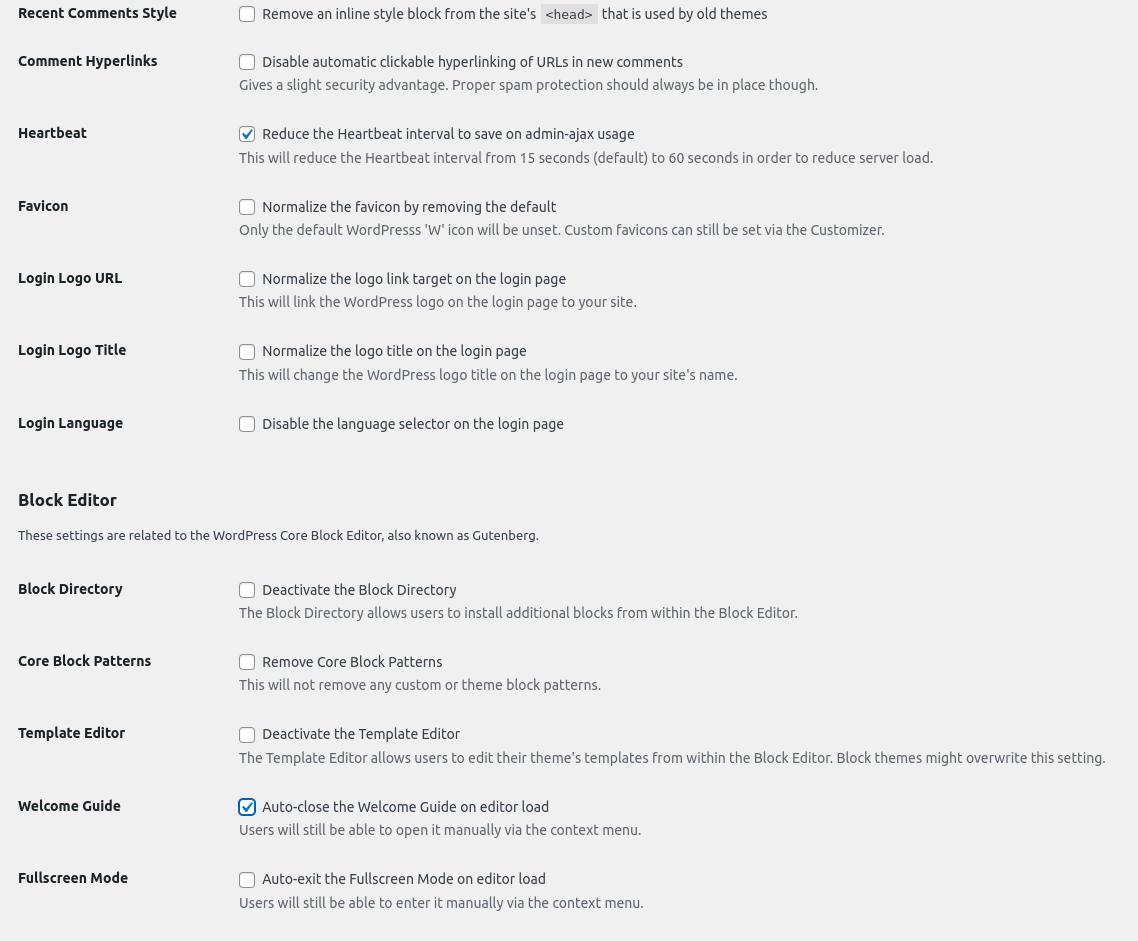
You can of course modify the settings based on your needs. If you notice some problem, disable the plugin and everything will be fine again. Nothing is permanente on these settings. Make sure to fully disable Gutenberg if you prefer the Classic Editor.
3 - Control the Heartbeat API
Heartbeat API allows the browser to communicate with the WordPress server without refreshing the page/clicking on anything. This is useful because this allows auto saving for posts for example since you don't need to click on the save button anymore to manually save each time.
Heartbeat is used by other plugins too so it's important to have it active unless you are sure that you don't need it at all. The issue with Heartbeat is that it can use a great amount of CPU, and that will be bad if you are on a shared hosting or if you are using a weaker VPS.
By default it is called every 15 seconds. Changing it to 60 seconds is usually enough to reduce the CPU usage. To control the Heartbeat, you can use the plugin "Unbloater" or a standalone one like HeartBeat Control:
Matt Lucas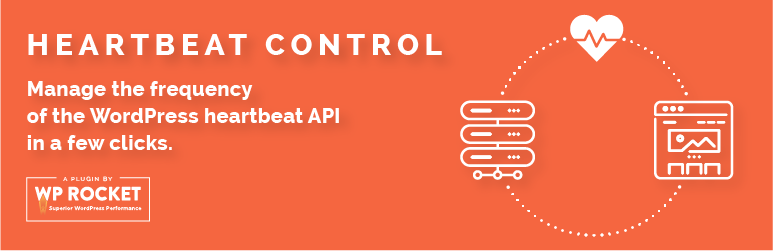
4 - Control post revisions
Maybe you did not know it, but WordPress keeps 25 post revisions by default. This means that when you write a new post, if you write it for 25 minutes, you will have 25 copies of your post in the database. This happens because WordPress creates a post revision every minute by default
This may not seem much, but over time it can be insanely huge. I'do recommend reducing the post revisions or disabling it totally if you don't need it. You can again do it with Unbloater or add this at wp-config.php:
define( ‘WP_POST_REVISIONS’, 3 );
This will limit post revisions to 3. If you prefer to disable it totally, you can use this one:
define( ‘WP_POST_REVISIONS’, false );
5 - Disable/limit xmlrpc.php
The most common attack vector on WordPress is xmlrpc.php. Some users change /wp-admin to something else and keep xmlrpc.php turned on. This makes no sense because most bots will actually try to login to your site using this file.
I'do recommend disabling this file 100% unless you find a reason to enable it. There are several ways to do that. If you are using Apache/LiteSpeed, you can use this code on .htaccess:
<Files xmlrpc.php>
order deny,allow
deny from all
# allow from IpThatYouWantToWhitelistHere #Uncomment when you need to whitelist a IP.
</Files>
If you have installed unbloater, there is also a option to disable this file there. Other than that, if you are using Cloudflare you can block that path using Cloudflare. The plugin Loginizer will also do the job
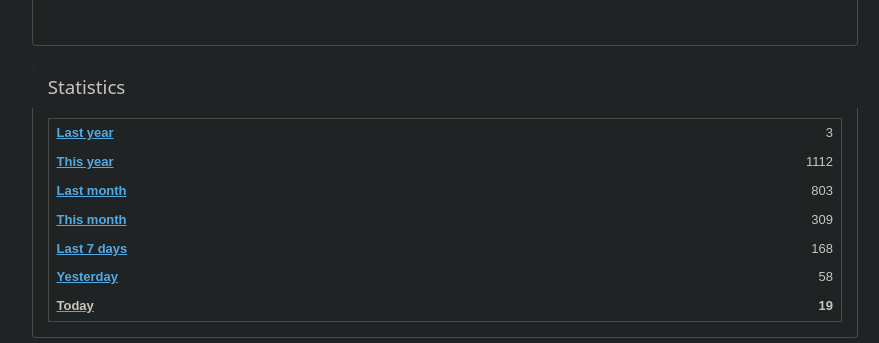
6 - Limit login attempts
WordPress is the most famous CMS and with great power, comes great responsibility. WordPress is also the CMS that most bots are focused on hacking. Even disabling indexation, you will be surprised on how much people are trying to login at your site:
To prevent that, I'do highly recommend a plugin. Limit Login Attempts Reloaded is a solid option as it will limit the login tries not only at /wp-admin but for xmlrpc.php too.
cookerandalooker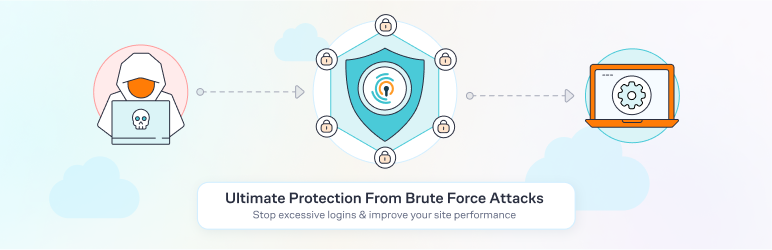
Another one that seems to work really well (I can't recommend 100% since I'm not sure if they are providing the protection that they claim to provide) is Brute Guard:
Abd Ur Rehman R.T.
Instead of blocking IP's of attackers directly inside your site, BruteGuard is actually a network. So it is "smarter". If the IP 43.65.46.86 for example is known for trying to hack WP sites, Brute Guard will block it for your site too even though it didn't try to hack your website yet.
The idea is very good, but again, I'm not sure if the project is working as intended, so my #1 recommendation would be Limit Login Attempts Reloaded.
7 - Verify the plugins before installing them
There are a lot of unpopular plugins that are GREAT and a lot of popular plugins that are not great. I will show you two other ways other than reading reviews to check the plugin quality.
You can use a site called WP Hive and a site called Plugins Tests to check the the quality before choosing a plugin,
For example, let's check Yoast SEO on its current version (20.1). Checking Plugins test, we can see this information at plugin tests:
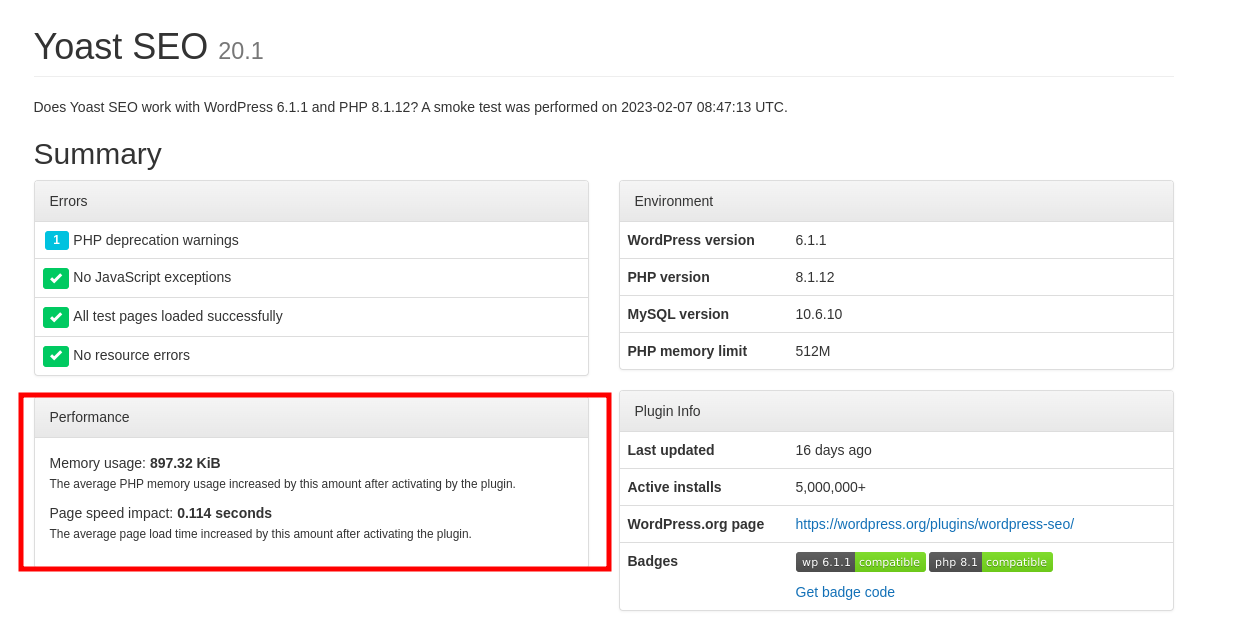
Perhaps you don't know what it means, but Yoast is pretty heavy. It is using almost 1MB of ram which is a lot for a plugin and it is increasing page loading time by 0.1 seconds.
Using the WP Hive chrome extension you can also see the summary of the plugin directly on the plugin repository:
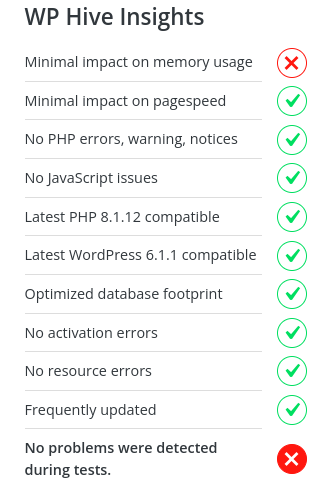
Inside their site you can see the full analysis as well.
I'm not saying that Yoast is 100% bad and you shouldn't use it. If you love it, then go for it, but there are SEO plugins that uses less resources. Your aim should be to use lightweight plugins as much as possible, only use heavier plugins when you need it.
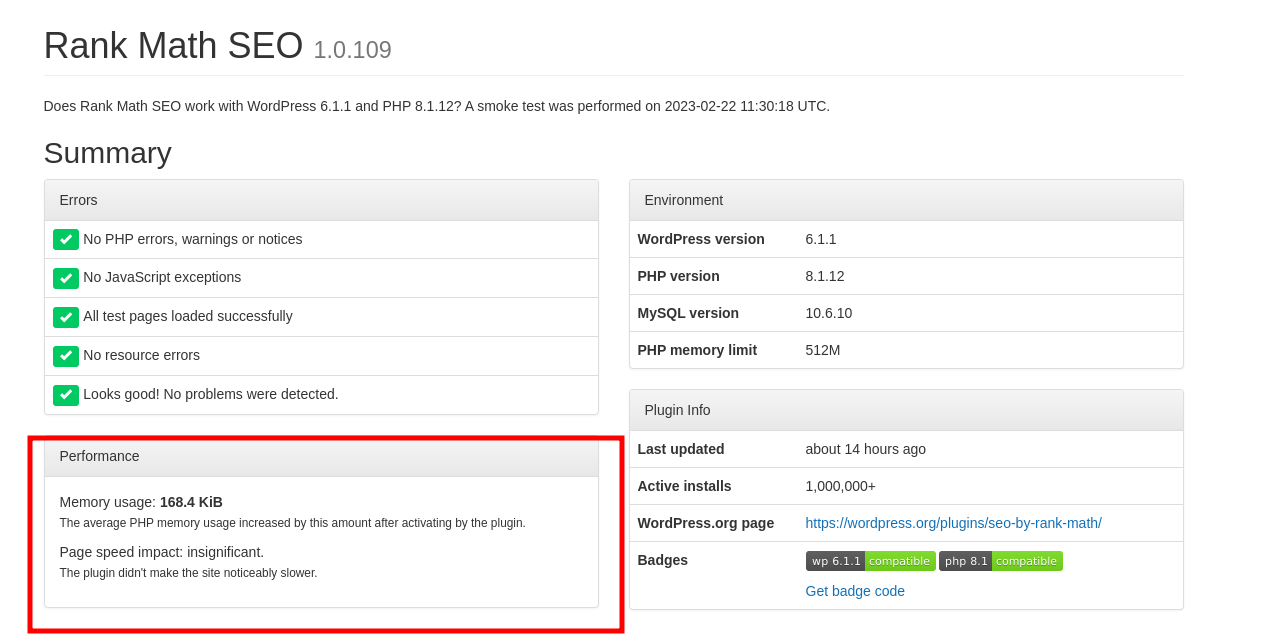
If you check Rank Math SEO for example, it is using much less ram and has no effect on the page loading time:
Conclusion
That is pretty much it! As you can see, you don't need to spend any money or time to do these actions. Following these steps will ensure more performance and smoothnes in the long run for your website. Feel free to add any additional steps that you would recommend in the comments section.
If you enjoyed this article, you can share it with your friends or subscribe to The Self Hosting Art. Thank you for reading :)
You can also help with XMR(Monero):

8AWKRGyqQ6fdaLwGVAdVTbEP6ZttSXwcYWQWy7gnq6zceTngtJgaAr82Hxr2FY5bkCUJVerccH9XNFX1qWnZxuGYTU5bJ34


