
Introduction
Hello! Today we are going to learn how to setup a complete email setup using “EmailWiz”, a complete email setup created by Luke Smith. Additionally, we will also setup RoundCube, which is a free and open source Webmail client.
So, let’s get started! First thing, buy a cheap VPS at Cloudcone. If you want to help me, you can click on THIS link before clicking on the first link. The second link is my affiliate link and if you click on it before clicking on the cheap vps link, I will earn a commission. Of course, you can use ANY vps provider, but I will show the step-by-step with Cloudcone.
If Cloudcone doesn’t have any sales while you are reading this article, check RackNerd or the Offers category at LowEndTalk.
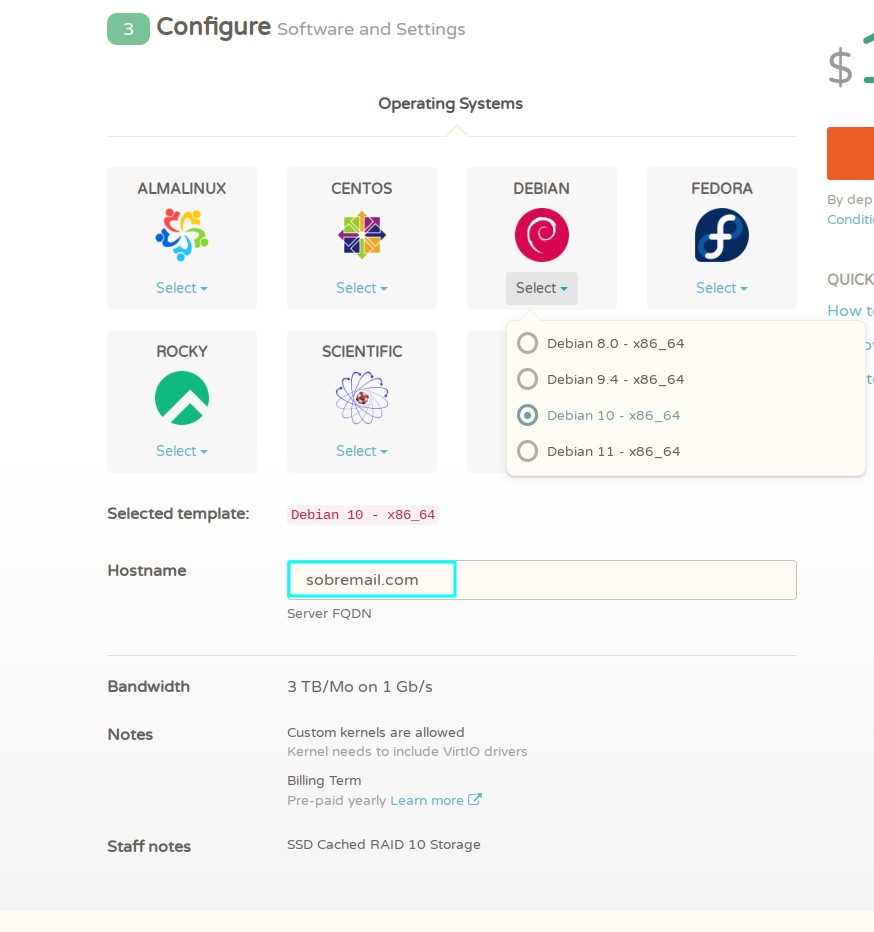
On the setup, make sure to choose Debian 10 and on the hostname, put the domain that you want to use for email. In my case, I will use sobremail.com, so my emails will be “anythingthatIwant@sobremail.com”:
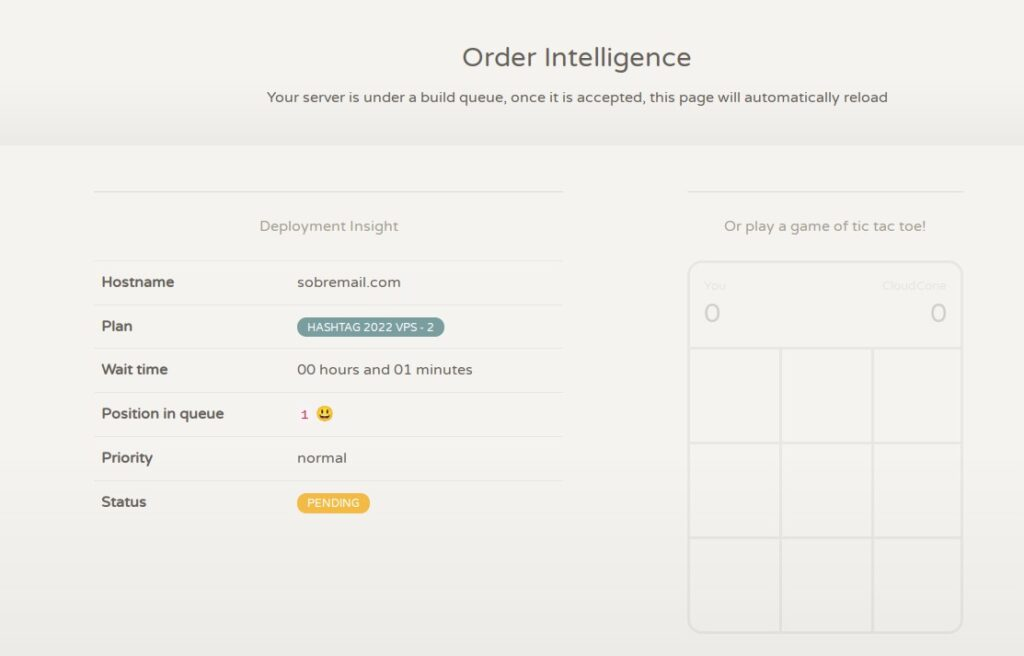
Now, wait a few minutes while your VPS is being deployed:
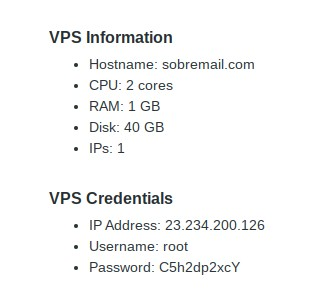
Now, check your email to get the password and login on your VPS:
VPS Setup
Before you think I’m the dumbest person in the world and exposed my root vps password, remember that I will change the password and I will disallow the password authentication, so even with the password, you can not login 🙂
Let’s enter on the VPS now and perform all the updates:
ssh root@23.234.200.126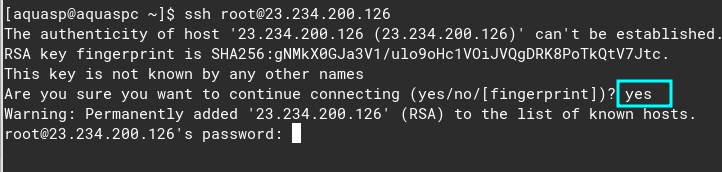
apt updateType “y” for any warnings during the apt update:
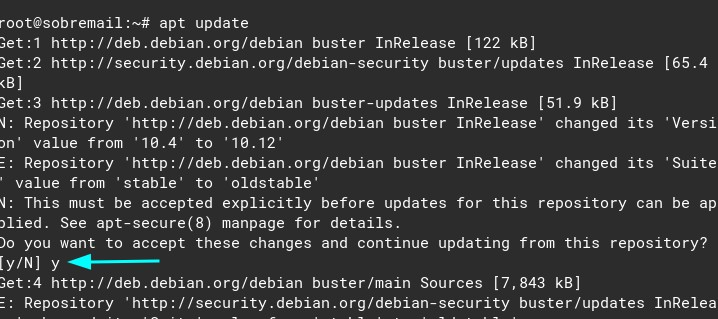
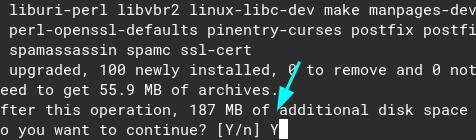
apt upgradeIf a warning appears on the middle of apt upgrade, type “q” to quit. The update should continue 🙂
Once everything is updated, let’s make our vps secure. First of all, let’s change the password:
passwdAfter choosing a new password, let’s disable the password authentication, so only you can login. First of all, make sure that you have a ssh key. Now, exit the VPS with:
exitAnd add the ssh key to your vps with this command:
ssh-copy-id root@yourIPType your password and now login again:
ssh root@yourIPThe password wasn’t asked for you, did you notice? It’s due to your SSH key 🙂
Securing the VPS
Now, let’s secure our VPS. With a file editor, open the sshd_conf file.
nano /etc/ssh/sshd_configInside the file, use ctrl + w to search if you are using nano like me. Search for “password” and remove the comment from this line:
Instead of #PasswordAuthentication yes, remove the # and add replace yes with no.

Now, search for usePAM yes and change it to no:
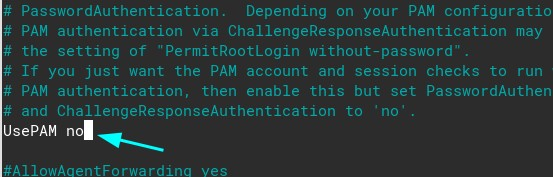
Use ctrl + O to save the file and ctrl + X to close the file. Now, restart the ssh service:
systemctl restart sshdOur VPS is fully secure now 🙂 No one but you can login at your VPS.
Installing EmailWiz and SSL
With that done, let’s start the Luke script! First, install some dependencies
apt install curl nginx python-certbot-nginxPerfect, now, if you access the IP of your VPS, you should see the welcome to nginx message:
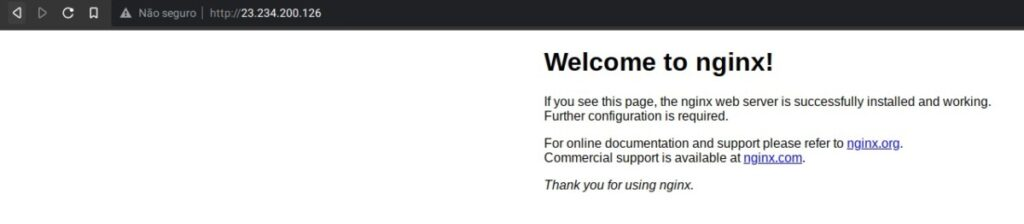
Any domain or subdomain that points to your VPS will also display the welcome to NGINX screen. Why? Well, simple. On Debian/Ubuntu, nginx uses a folder to access the configuration files from the websites. This folder is “/etc/nginx/sites-enabled.” On this folder, notice that we have a file called “/etc/nginx/sites-enabled/default”.
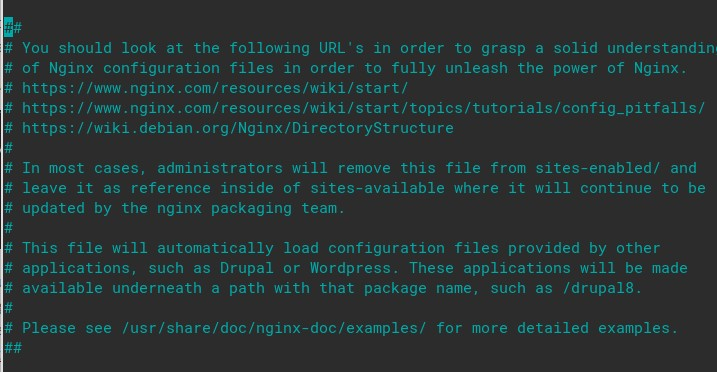
If you open this file, you will see this:
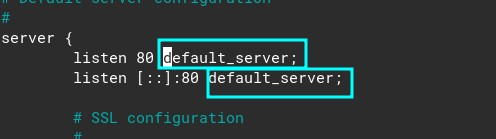
Default server means that, if there is no configuration file for a certain domain that is pointing to your VPS, this configuration file will be used. So by default, anything that points to your VPS will display this Welcome to nginx screen. If someone at google.com went crazy and pointed google.com to your your VPS, then google.com would display this welcome to nginx message. Of course, we can edit this page and change it to anything that we want. We could even remove the default_server from it and add on another configuration file, but we will do it later.
Let’s continue our installation. To continue, let’s quickly point our dns records to our vps. On your DNS provider, create these records:
mail.yourdomain.com pointing to YourVpsIP
yourdomain.com pointing to YourVpsIP
Once you are done with the DNS records, let’s copy the default configuration file to a new one.
cp /etc/nginx/sites-enabled/default /etc/nginx/sites-enabled/sobremailNow let’s open our new file and delete all the comments to make it cleaner:
nano /etc/nginx/sites-enabled/sobremail On nano, you can use ctrl +K to delete these blue lines. You will need to use ctrl + K manually on each blue line if you want to remove all of them, but removing them is optional. I will remove just to show you the pure configuration file.
It looks better now:
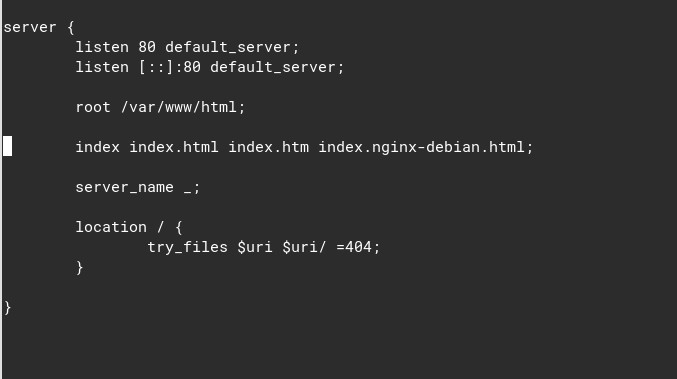
Now, let’s change some stuff. First thing, remove the “default_server” from listen 80 and listen [::]:80. Remember that there can only be one default_server configuration file. The file “default” already have that “default_server”. If we leave it there, it will crash nginx and fail:
nginx: [emerg] a duplicate default server for 0.0.0.0:80 in /etc/nginx/sites-enabled/sobremail:2So make sure to remove “default_server”. It can’t be a duplicated.
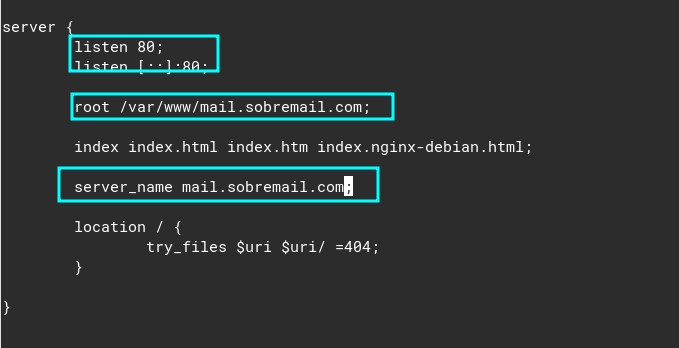
Next thing we need to do is to choose our mail server. I will choose mail.sobremail.com so sobremail.com will be the domain for Roundcube later 🙂
With that said, I will change the “root” to “root /var/www/mail.sobremail.com” and “server_name” to “mail.sobremail.com”. The final result is:
Save and close the file again with ctrl + O and ctrl + X.
Now, test nginx to see if your setup was done correctly:
nginx -tIf everything is ok, you should see this:

If things are not ok, check your config file. Make sure that you removed default_server and that there is a ; on the end of each line.
Next thing that we need is to setup the SSL. Make sure that your mail.domain.com is already pointing to your VPS (you can use some tool like https://dnschecker.org/#A):
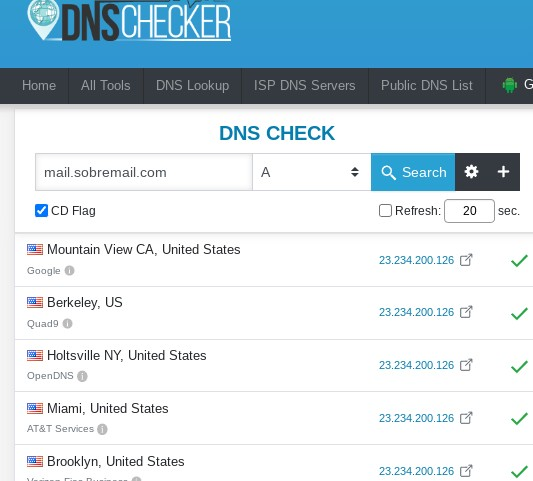
If you see all/most countries with a “check” you should be good to go.
Now, on the VPS, let certbot create the SSL for you 🙂
You can do it by doing:
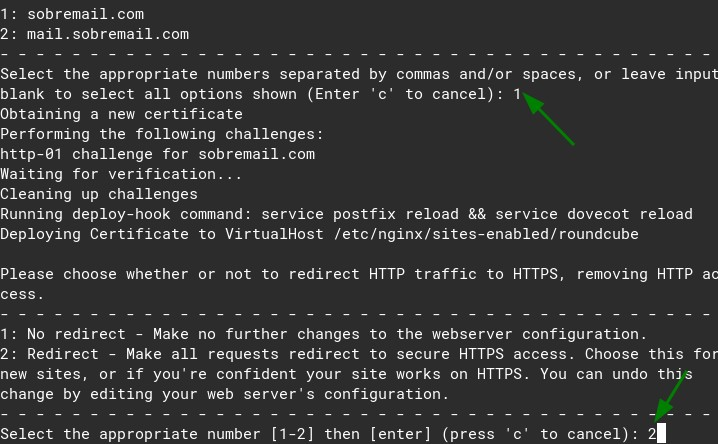
certbot --nginxYou will be asked a few questions. You can reply them safely. Put your email, agree with the terms of service, etc. Them, when asked about the domain, put the number “1”
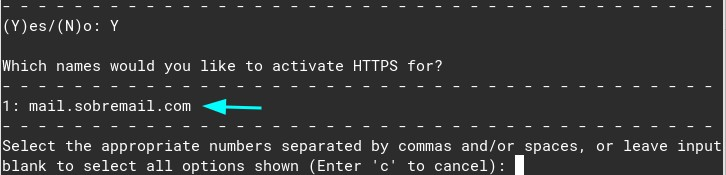
Type 1, to issue the ssl and then type 2 to redirect all the requests to https:

Congrats! Now you have ssl at mail.yourdomain.com 🙂
Now it’s time for some magic. Let’s download Luke Smith’s script and run it.
curl -LO lukesmith.xyz/emailwiz.sh
sh emailwiz.sh
Type “Y”:
Press TAB to select “ok” and and hit enter:
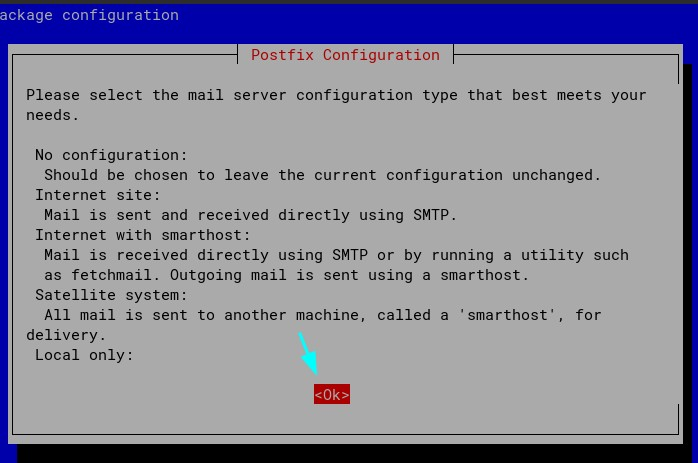
Type enter on the next screen as well:

On the system mail name, make sure to delete localdomain and type ONLY yourdomain.com
Do NOT type mail.yourdomain.com. You must use your domain. Otherwise, your emails would be jonh@mailyourdomain.com instead of jonh@yourdomain.com for example.
(I forgot to take the screenshot, but in my case, I typed sobremail.com and hit enter.
Now let’s wait a few minutes until the installation finishes 🙂
Once it finishes, you will see this awesome screen:
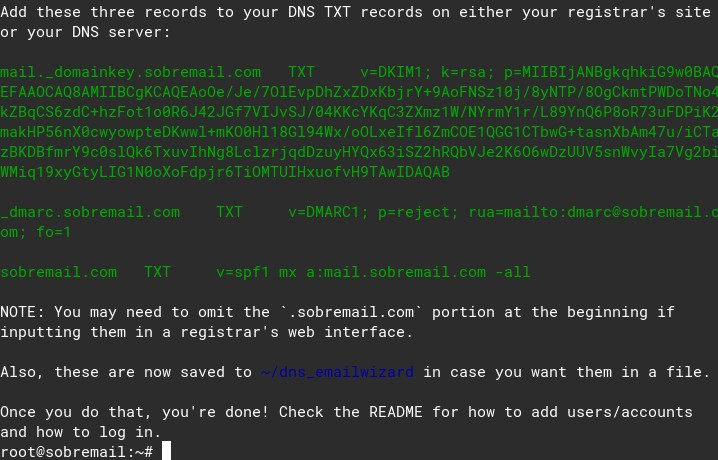
Make sure to create these records at your DNS provider.
They are all TXT records. The name of the first one is mail._domainkey, the second one is _dmarc and the third one is just a apex record (a record for the main domain). You can ask help at our forum or at your registrar if you need.
After creating these DNS records, you can start creating users 🙂
To create a new mail account for sobremail.com, I will just run this command:
useradd -G mail -m aquaspWith this command, I’m creating the mail account “aquasp”. So it will be aquasp@sobremail.com
Now, we just need to define the password for aquasp.
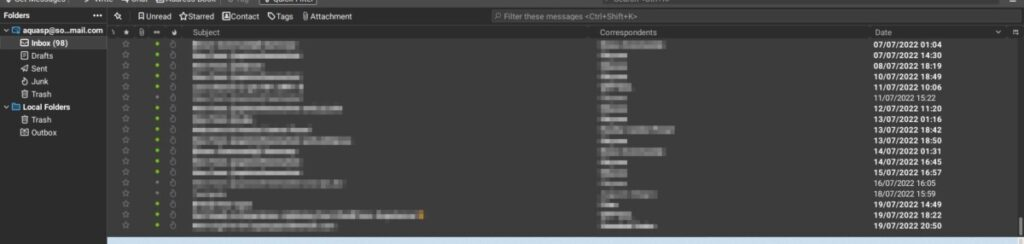
passwd aquaspNow your mail account is created! Want to check? On Thunderbird, you can use these settings:

Of course, replace sobremail.com with your own domain.
In my case, the email is working perfectly on Thunderbird:
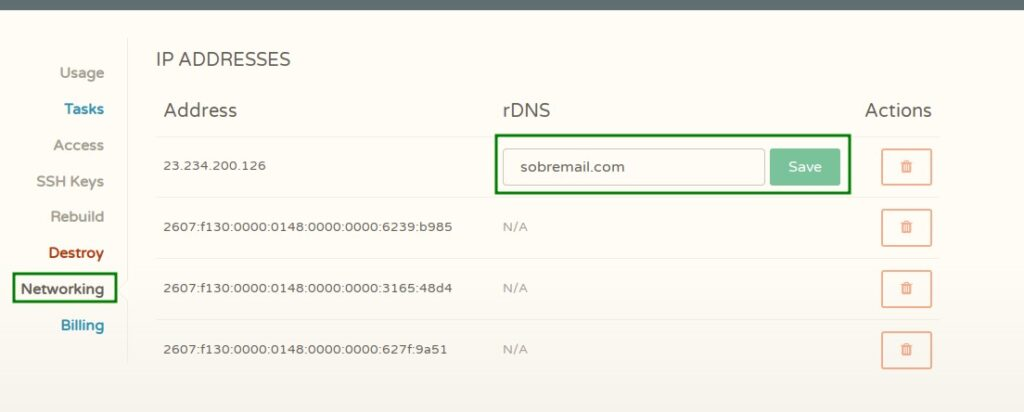
But, although the email is already working, you need to take care of reverse DNS to make sure that your email won’t be considered spam. On Cloudcone, you can go to “Networking” and enable the “rDNS”.
On rDNS, put “yourdomain.com” and click on save. DNS propagation may take a few hours/days sometimes, so be patient.
In the screenshot below, Ipv6 is enabled, but don’t enable IPv6 for email in Cloudcone. I contacted their support to ask about reverse dns on Ipv6, and they don’t support it yet. In this case turning Ipv6 will HURT your emails and they will go to spam because there is no reverse dns for ipv6.
If you enabled Ipv6 by mistake, don’t worry, you can reach out their support and ask them to disable it.
Roundcube setup
If all is looking great on DNS, let’s go to the final part, Roundcube!
RoundCube is a really lighweight and easy to use mail client. In my opinion, it’s better than things like Gmail, outlook, etc. It’s lighting fast and easy to setup.
First thing, let’s add the backport repository at our Debian. Open /etc/apt/sources.list
nano /etc/apt/sources.listAdd this line:
## Adding the backport repo
deb http://deb.debian.org/debian buster-backports main
It should look like this:

Finally, let’s install the last things that we need for RoundCube:
apt install -y lsb-release ca-certificates apt-transport-https software-properties-common gnupg2
echo "deb https://packages.sury.org/php/ $(lsb_release -sc) main" | tee /etc/apt/sources.list.d/sury-php.list
wget -qO - https://packages.sury.org/php/apt.gpg | apt-key add -
apt update
apt install php-net-ldap2 php-net-ldap3 php-imagick php8.0-common php8.0-gd php8.0-imap php8.0-mysql php8.0-curl php8.0-zip php8.0-xml php8.0-mbstring php8.0-bz2 php8.0-intl php8.0-gmp php8.0-redis mariadb-server php8.0-fpm
Now, let’s secure our mysql installation with:
mysql_secure_installationYou can just hit enter for all options.
Now, let’s enter on mysql:
mysqlAnd here, we can create the database, create the user and flush privileges(obs remember to replace password with your real password. Choose a strong pass for DB)
CREATE DATABASE roundcube DEFAULT CHARACTER SET utf8 COLLATE utf8_general_ci;
CREATE USER roundcubeuser@localhost IDENTIFIED BY 'password';
GRANT ALL PRIVILEGES ON roundcube.* TO roundcubeuser@localhost;
flush privileges;
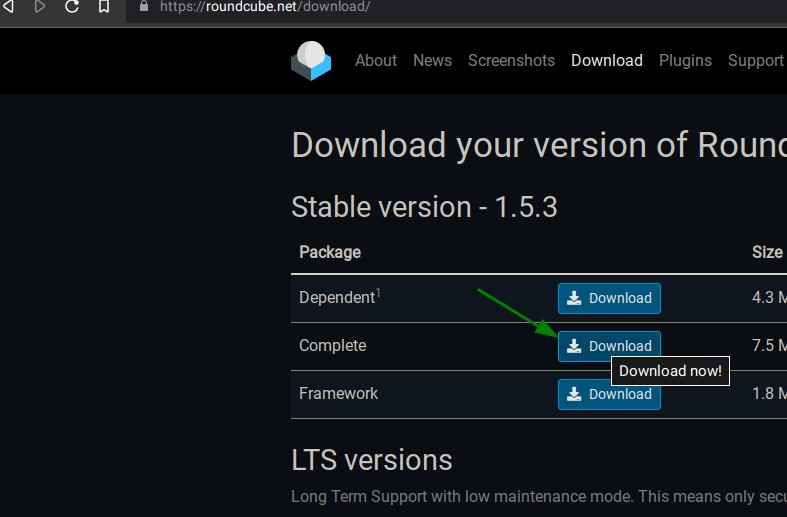
exit;Now let’s download RoundCube and import the initial tables. First let’s create a directory to it, enter into it and download RoundCube. We will also add the ww-data permission to roundcube, so nginx can write and delete files there. You can get the latest RoundCube version HERE. Make sure to download the complete version.
cd mkdir /var/www
wget -c https://github.com/roundcube/roundcubemail/releases/download/1.5.3/roundcubemail-1.5.3-complete.tar.gz
tar -zxvf roundcubemail-1.5.3-complete.tar.gz
mv roundcubemail-1.5.3 roundcube
rm -rf roundcubemail-1.5.3-complete.tar.gz
cd roundcube
chown www-data:www-data temp/ logs/ -R
Ok, now let’s import the initial tables
mysql roundcube < /var/www/roundcube/SQL/mysql.initial.sqlOk, now let’s create the config file for our roundcube.
nano /etc/nginx/sites-enabled/roundcubePut this file inside and replace yourdomainhere.com with your real domain.
server {
  listen 80;
  listen [::]:80;
  server_name yourdomainhere.com;
  root /var/www/roundcube/;
  index index.php index.html index.htm;

  error_log /var/log/nginx/roundcube.error;
  access_log /var/log/nginx/roundcube.access;

  location / {
    try_files $uri $uri/ /index.php;
  }

  location ~ \.php$ {
   try_files $uri =404;
    fastcgi_pass unix:/run/php/php8.0-fpm.sock;
    fastcgi_index index.php;
    fastcgi_param SCRIPT_FILENAME $document_root$fastcgi_script_name;
    include fastcgi_params;
  }

  location ~ /.well-known/acme-challenge {
    allow all;
  }
 location ~ ^/(README|INSTALL|LICENSE|CHANGELOG|UPGRADING)$ {
    deny all;
  }
  location ~ ^/(bin|SQL)/ {
    deny all;
  }
 # A long browser cache lifetime can speed up repeat visits to your page
  location ~* \.(jpg|jpeg|gif|png|webp|svg|woff|woff2|ttf|css|js|ico|xml)$ {
       access_log        off;
       log_not_found     off;
       expires           360d;
  }
}
Again, check if your settings on nginx are correct with nginx -t.
If no errors were reportes, we can just restart nginx and setup the SSL for the other domain
systemctl reload nginx
certbot --nginx
Now, this is just a improvement, but I would recommend if you want a faster roundcube.
Edit the /etc/hosts file and add yourdomain.com besides “localhost”:
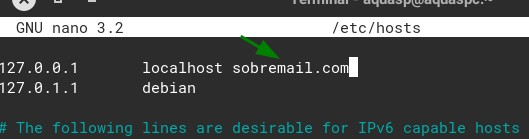
This will speed up the page loading a bit because now roundcube won’t have to use the internet to find out that he is hosted at its own vps.
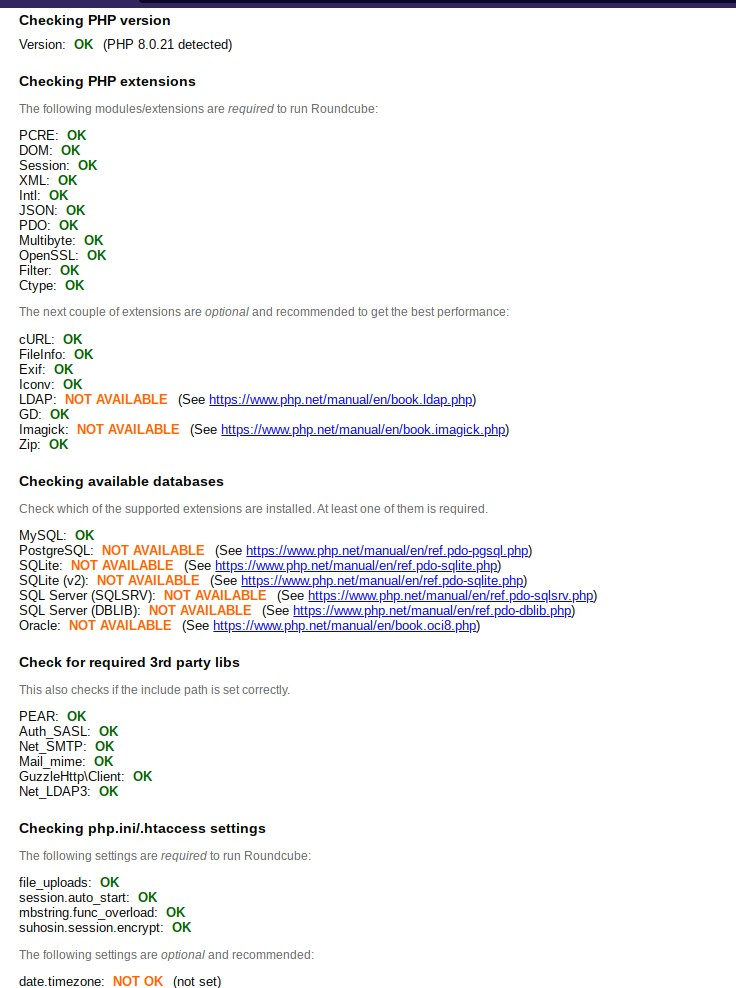
Time to get some fun! Go to yourdomain.com/installer and you will be glad to see the roundcube installer:
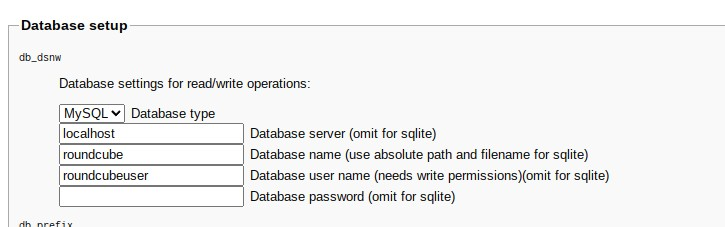
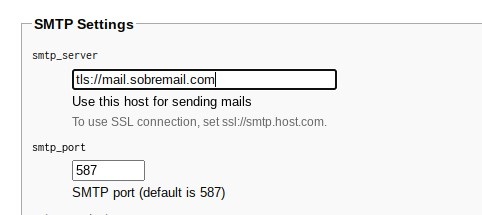
Feel free to change or to not change the other settings. The important part here is this one. Make sure to replace the database details with the ones that you created before:
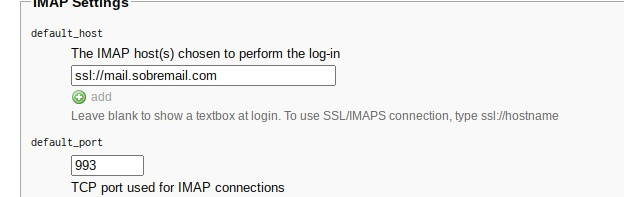
Here make sure to replace sobremail.com with your own domain:

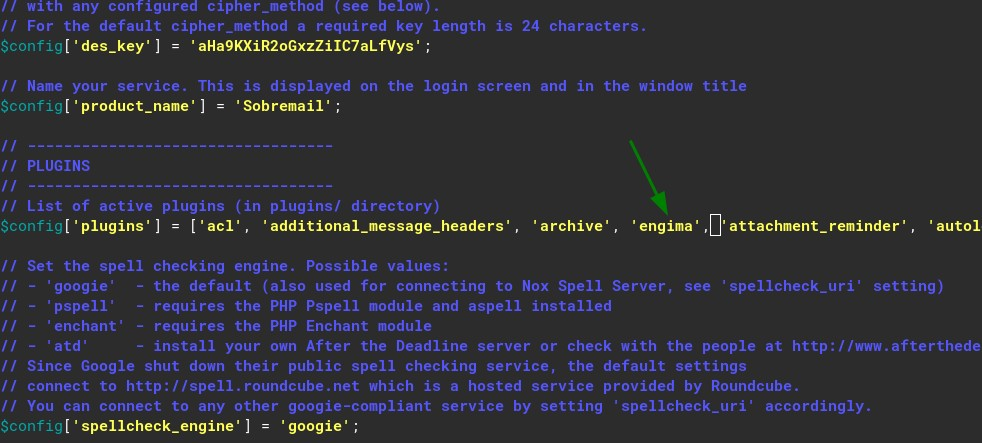
For the plugins, you can enable all of them(except for Enigma because it breaks one thing at the interface.
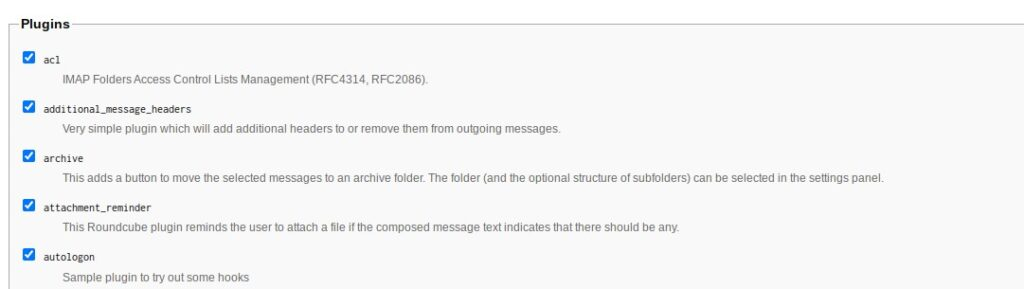
If you need to disable one or two later, that can be done at /var/www/roundcube/config/config.inc.php.
Once you finish the configuration, Roundcube will give you some lines. Copy the lines and open this file:
nano /var/www/roundcube/config/config.inc.phpCopy all that code into this file and save. After doing it, let’s go to our last step! Click on continue:

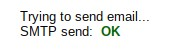
Put any account that you created previously. The username and the server should be the same.
If you did everything correctly, that is what should appear:
Test the IMAP too:
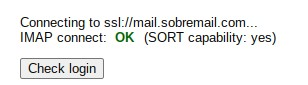
Now, finally, go to yourdomain.com and make the login at Roundcube. Is everything looking good?
If yes, make sure to delete the installation folder:
rm -rf /var/www/roundcube/installerIncreasing max upload size for attachments
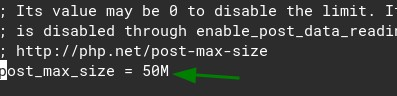
Last thing, let’s just increase the max size for attchments 🙂
Go to php.ini:
nano /etc/php/8.0/fpm/php.iniFind both upload_max_filesize and post_max_size. Increase then to 50M for example if you want to be able to send up to 50M attachments :), like this:
Now, just restart PHP fpm and be attachments size should be good to go
systemctl restart php8.1-fpmNow we are basically all set. The last thing that I would recommend is to change a few settings under the roundcube settings.
To do so, let’s go to this path:
nano /var/www/roundcube/config/config.inc.phpInside this file, make sure to add this
//Defines the correct default domain. Now we can login with just the user
$config['username_domain'] = 'sobremail.com';

// Session lifetime in minutes
$config['session_lifetime'] = 259200; //six months
Also, make sure to remove enigma from here if you added it before:
That is the final result:

I’m sure that you want to know why. Well, it’s quite simple, $config[‘username_domain’] defines the domain. Defining the default domain means that you don’t need to put the whole domain anymore:
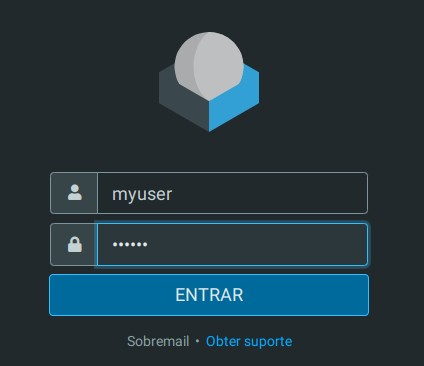
Just putting “myuser” now works as myuser@sobremail.com.
The second part, $config[‘session_lifetime’] = 259200, defines the expiration time of the cookie on your browser. By default, roundcube will log you out in under 10 minutes, so you always have to make the login again. That can be annoying so you can increase the expiration time of the cookie. In my case, I set the expiration time to 6 months (259200 minutes).
This means that if I don’t clear my cookies, I will only need to login on sobremail.com twice per year 🙂
And the last part, removing “enigma” is to avoid a glitch inside “identities”. After removing the enigma plugin, it should work fine:
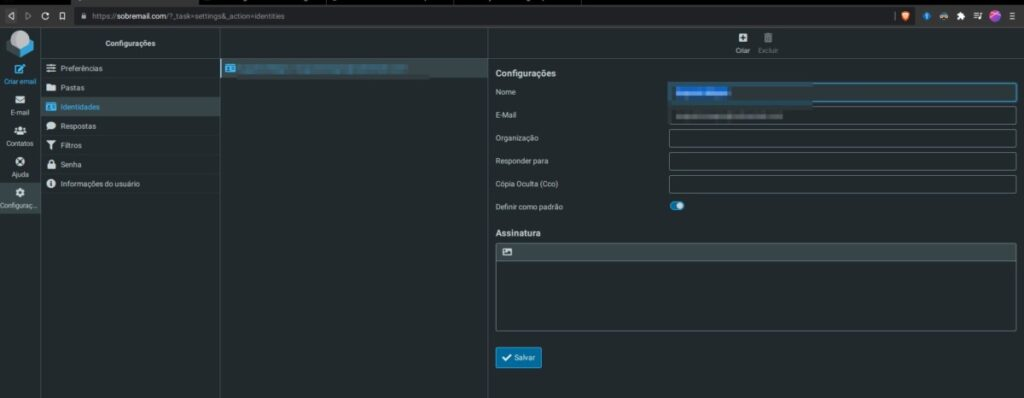
Before I removed the enigma plugin, I was getting an error 600 here.
Securing your RoundCube against brute force attacks
One last thing that is also REALLY important is to protect yourself from brute force attacks.
To do so, install fail2ban:
sudo apt install fail2banOnce you do that, grab the download link of the latest version here:
 texxasrulez
You can also just copy and paste my commands below:
cd /var/www/roundcube/plugins
wget -c https://github.com/texxasrulez/roundcube_fail2ban/archive/refs/tags/1.4.zip
unzip 1.4.zip
rm 1.4.zip
#The plugins NEEDS to be called fail2ban. Using another name will fail
mv roundcube_fail2ban-1.4 fail2ban
Now, enable the plugin at roundcube:
nano /var/www/roundcube/config/config.inc.phpAdd it like this:

Now the fun part is coming. Go to this path:
nano /etc/fail2ban/jail.confAdd this code below "[apache-noscript]" (or any other place that won't break anything).
[roundcube]
enabled  = true
port     = http,https
filter   = roundcube
action   = iptables-multiport[name=roundcube, port="http,https"]
logpath  = /var/www/roundcube/logs/errors
maxretry = 5
findtime = 600
bantime = 3600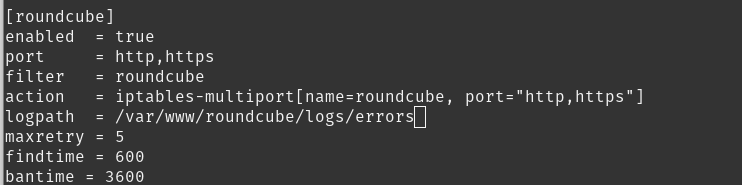
Finally, go to this path:
nano /etc/fail2ban/filter.d/roundcube.confAnd add this code:
[Definition]
failregex = IMAP Error: Login failed for .* from <HOST>(\. .* in .*?/rcube_imap\.php on line \d+ \(\S+ \S+\))?$

ignoreregex =
After saving it, just restat php and fail2ban
pkill -f "php"
systemctl restart php8.0-fpm
service fail2ban restart
Now, try to hack yourself! Go to incognito, and try to login with a bad password/user.
Once you tried to login, you can check the login logs here:
tail /var/www/roundcube/logs/userlogins.logIt will look like this(the blur part is on my own server details/IP)

[18-Dec-2022 20:29:09 -0500]: <eucmoafs> IMAP Error: Login failed for asdhasd@sobremail.com against [YourServerEmailAppearsHere] from [YourIPAppearsHere]. AUTHENTICATE PLAIN: Authentication failed. in /v$
Obs: If you check the other error log (errors.log) you may notice this error as well:
PHP Error: Can use only one plugin for attachments/file uploads! Using 'database_attachments', ignoring others.That seems to be a annoying bug on filesystem_attachments core plugin, so you can just ignore it.
I tried to disabled it at the config, but the same error keeps appearing. Perhaps installing a newer roundcube versions fixes the issue, but I'm happy using the LTS for now.
Nice! We are good to go now :)
Credits
This guide would not be possible without the help of these great guides/articles/issues:
Setup Roundcube on Nginx/Apache Ubuntu 20.04 – LinuxBabeIf you enjoyed this article, you can share it your friends or subscribe to The Self Hosting Art to keep us motivated. Thank you for reading :)
Error 600 on identities – Github Roundcube
Setup your own site and email on a VPS – Luke Smith
Installing PHP 8.0 on Debian 10 – Computing for Geeks
Using Fail2Ban with Roundcube - Matt Rude
RoundCube login attack prevention with fail2ban
You can also help with Monero, Litecoin, Bitcoin or Nano: Monero:837X2SppmrrPkBbpsy9HQU1RFxKhsBcn6GdQv2wR5wGoiw8ctfh6Rt36xaszveZHysYA5KSDBr51y5YuQ3YCV23sJS9nhqW BTC:bc1qrvgz7dzzlfllulakw87vzvtf7s2u8t0sxpjehr Litecoin:ltc1qycz6ssg6xjxttuld6l6ulzqdr3y70rm8wv2g9p Nano:nano_1jmd6dg4dbem7f3wrojr7g45ioe6eb5et3iq11f8urfxe8qausxipup8bhua


